After CSx installation, remove the dongle from USB port.
click ![]() icon for Windows start menu
(located in lower left corner), select 'All Programs', select 'CSx'
and choose 'Install.exe'. following dialog box will display.
Check the USB Dongle check box. Click Standalone radio button.
Click Begin Install button:
icon for Windows start menu
(located in lower left corner), select 'All Programs', select 'CSx'
and choose 'Install.exe'. following dialog box will display.
Check the USB Dongle check box. Click Standalone radio button.
Click Begin Install button:

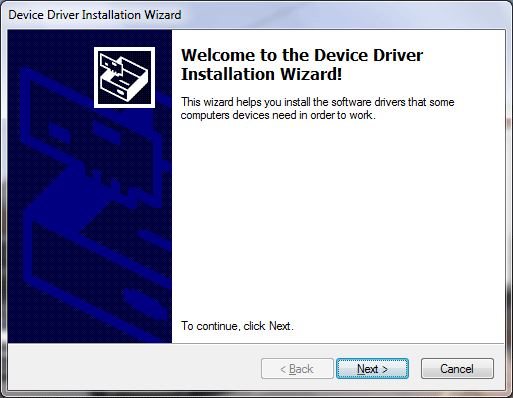
Another dialog box will appear. Click Next > button:
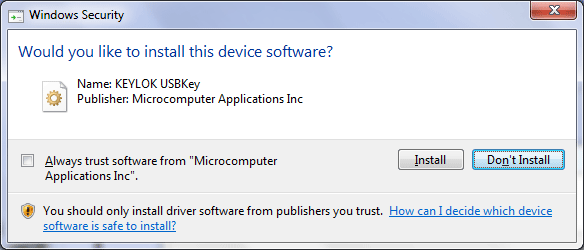
Click Install button:
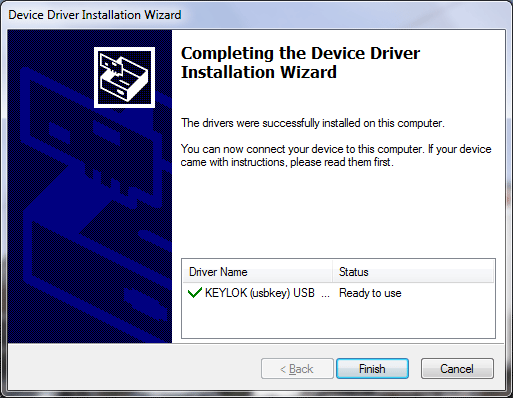
Click Finish button:
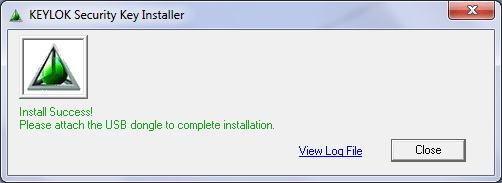
Click Close button:
This message will display in lower right corner of your task bar:
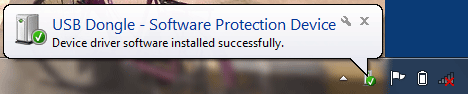
Device driver for dongle is installed. Now check your dongle device. Read bellow.
Check your dongle device (both for 32 and 64 bit):
Insert the dongle in USB port.
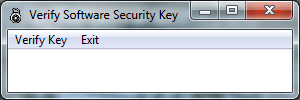
Click ![]() icon for Windows start menu (located in lower left corner), select 'All Programs',
select 'CSx' and choose 'VerifyKey.exe'.
This window will display:
icon for Windows start menu (located in lower left corner), select 'All Programs',
select 'CSx' and choose 'VerifyKey.exe'.
This window will display:
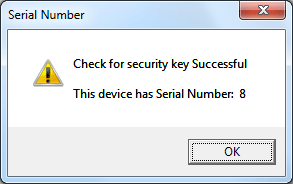
Select 'Verify Key' menu. The dongle serial number must display like this:
This is the message for successfully installed dongle driver.
